When looking more closely at any programming languages, developers have sometimes needed to find a more efficient one to improve their development experience. That’s the common background for creating a new programming language. So, I would like to introduce a brief history about React.js to you. I am going to talk about Facebook (currently Meta) as well, since React.js was created by Facebook developers.
React, sometimes referred to as a front-end JavaScript framework, is a JavaScript library created by Facebook. React is a tool for building UI components for the web.
How does React work? At its core, React makes use of a virtual DOM. Instead of making changes to the browser’s DOM directly, React creates and manages a virtual DOM in memory, where it makes any necessary changes before finally updating the browser DOM.
Additionally, React only changes what needs to be changed! React will figure out what has changed compared to the previous state of the browser, and then changes only what needs to be updated. While this blog post focuses on using React in practice, if you’d like to learn more about how React does this, it would be a good idea to look at the official React documentation.
As mentioned earlier, React was developed at Facebook (now Meta). In 2011, before the name “React” was even used, developers were having trouble maintaining their code. At the time, more developers were needed on the team to keep the product running smoothly. Thus, an urgent upgrade became necessary due to the lack of efficiency. Aside from efficiency, the user experience was also an area of concern. It was around that time that the developer Jordan Walke created a prototype that was called FaxJS (aka React). Though having a different name at the beginning, it was the start of React.js.
Shortly after, in 2012, Instagram was acquired by Facebook. At that time, the Instagram developers pressured Facebook as they also wanted to adopt Facebook’s new technology. Then in the next year, 2013, an event called JS ConfUS happened where Jordan Walke introduced React to the public. Over the next couple of years already major international companies started using React and even the first stable version of React Developer Tools was released, to further help development of React apps.
When learning programming languages, that means also we need to know about what the differences are, such as the language structures. Personally, I would like to see and understand basic structures first in any language that I am learning. So, I would like to introduce some basic structures which are useful in a practical way.
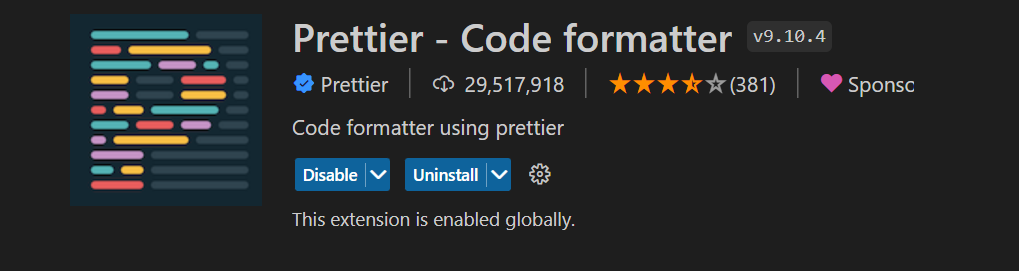
When you start using React, you can use Visual Studio Code (a decent IDE for React), and download Node.js for installing and running React. Among extensions in VScode, I would recommend downloading “Prettier” for code formatting. It will automatically make your codes and lots of brackets nicely aligned.
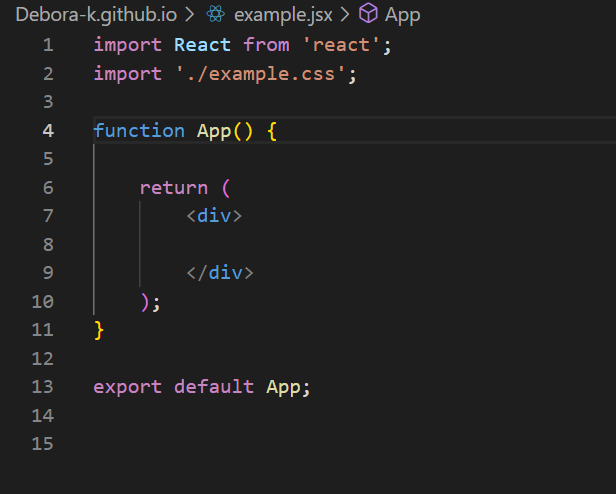
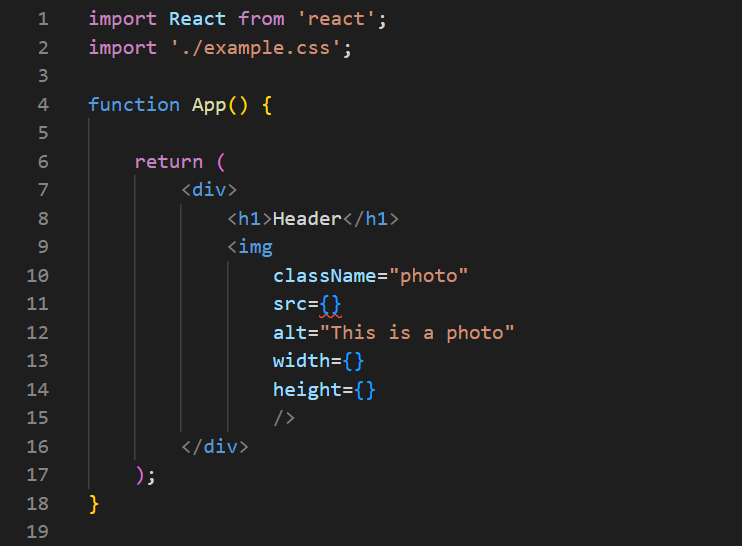
From the example above, there are import / function / return / export parts in the basic structure in React.
🔹 First of all, for using React, you need to create a file such as .js OR .jsx.
🔹 After that, you need to import React first. When connecting to / including another css file, you need to add it into the import part. So, later on, the import field can be really expanded.
🔹 The next main field is a function which returns JSX code and must start with a capital letter. Also, this function is called a component. I am presenting a basic way to create a function.
There is a more simple way to create a function such as: 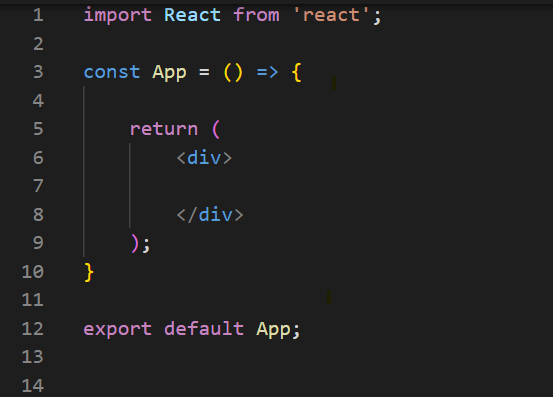
🔹 Inside of a function, you must add return ( ... ); as well.
In return, you are usually returning html things like <div>...</div>, or using other functions by adding <FunctionName /> that I will explain and show more things after this basic structure.
🔹 The last part of the structure is export.
The basic structure of export would be “export default FunctionName;” which allows the function to be used in other functions, or files.
React components aka functions use props to communicate with each other. Parent components are able to pass some information to their child components by giving them props. In the above basic structure example, if there are more things in <FunctionName /> like this:
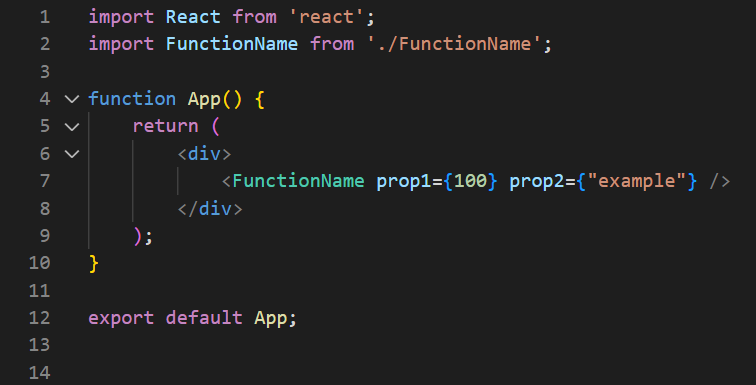
then this one is called “passing props to the child component(function)”. And then whenever using the child component, a developer must include the props inside of the child component under the parent component.
You can change the value of “prop1” or the “prop2” inside the parent component without having to think about how the child component uses them, as long as the value has the same structure that the child component expects. Similarly, you can change how the child component uses these props, without looking at the parent component.
Props are similar in appearance to HTML attributes, but with props you are able to pass any JavaScript value in them. That includes objects, arrays, and even functions
🔹 Familiar props: HTML tags, CSS classes
🔹 Passing props to a component: like <FunctionName />
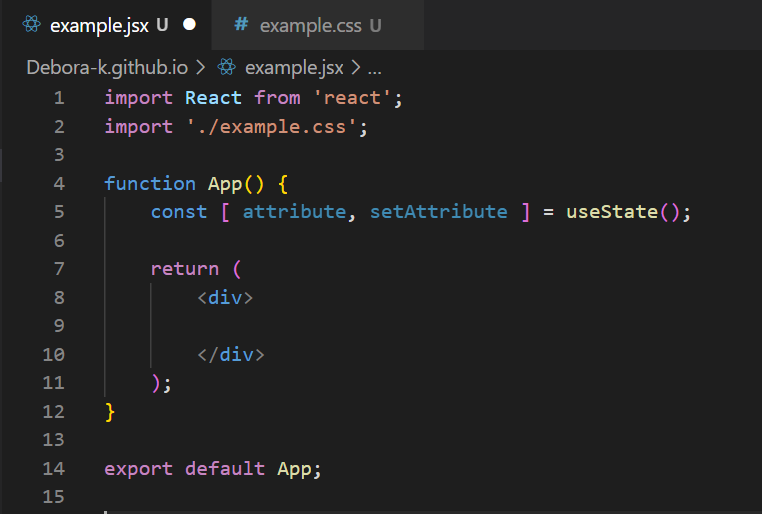
Let's dig into more React things is something called “useState()”
(I will talk about this soon). For this, first of all, you need to add import { useState } from 'react'; in the import field. You also need to set attribute and setAttributeName usually inside of square brackets which is called “array destructuring”. So whenever you are using the App function, then useState() will remember its current value when rendering for achieving an interactive user experience.
useState is a React Hook that lets you add a state variable to your component. For example, if a user clicked on any button, and that causes “setAttributeName” to be called, then the function will render and will change the “attribute” state variable. This is a big reason why React appeared: because a good user interaction experience was needed.
In addition, useState prefers to be used with some event handlers.
i.e) click handlers, on-change handlers, submit handlers, on-hover handlers, etc.
When learning a new language, you can give yourself a jumpstart by understanding / using important terms in that language for googling or reading docs.
🔹Component: This is what I called a function in this blog, and in React a component is a JavaScript function that returns JSX to be shown in the browser. When making Components, they can be small like a button or simple header, and there is no limit to how large they can be, like creating a whole page!
🔹JSX: This is a way to create HTML and other components by using a structure that looks like HTML, but is capable of showing dynamic information and has more rules (such as in the JSX rules section above). JSX is used in components, usually in the return field.
🔹Props: These are pieces of data that can be used to pass information between components. Particularly, Parent components give props to child components which means that the child components can get different data depending on what the parent gives it. Props are more flexible than HTML attributes, as any JavaScript value is a valid prop value, and JSX is a valid prop value as well.
🔹State: This is how a component can remember things (like a memory) after a component has changed in some way and needs to render again. That happens usually when a user is interacting with their browser. Some examples of things that a component could use as state are: shopping cart items in an online shopping app, an image being viewed in a gallery of photos, or the number of times a user clicked a button.
🔹Hooks: These are functions that React provides to use React features, like the state that I mentioned above.
🔹useState Hook: This hook is the starting point to creating a state variable in React. When using useState, you add a starting value that is called the “initial state”, and it returns a variable that holds the current state, and a function that updates the state when the function is called.
🔹Render: This is the process of React that prepares / creates a component by calling the function. When a parent component is rendered, its children components are also rendered, and so on. When rendering is done, then React eventually updates the browser DOM.
Next time, I will demonstrate how to create a simple To-Do list in React! 😊